MirrorMe provides you many ways to customize your interactions internally and externally. You can create projects to bundle workflows for individual clients or teams. In this article we will show you how to setup a project.
To create a project, click on the plus button.
Understanding your project settings
In project settings, there are four sections: general, messaging, branding, and privacy. Each section can be modified per project.
General
Project Name - Title the project as you would like it to appear in the Service App. The project name is for internal use and will not be visible to end users.
Locale - Select locale to set the display language for all functionality instructions in the mobile interface.
Messaging
Workflow SMS Message - Edit your text message for workflow invites. You can personalize the invitation with your company information and a default greeting.
The default code: {{URL}} generates the unique session link for each SMS or email invite. Never delete the {{URL}} code, as users would be unable to access the workflow without it.
Note: Click the two lines on the bottom right-hand corner to expand the text box.
Live Video SMS Message - Edit your text invite message for a live video call. Just like the workflow SMS message, make sure to include the {{URL}} code when creating your default message.
Email Message - Set up your email template email message with a link invite. Your email message is meant to read like a standard email. Make sure to start the message as you would for any email (i.e "Dear Company Name Customer,").
When the email message is not customized, you will see the code: {{MESSAGE}} defaulting to the system's template SMS message for email invites.
Thank You Message - Create a custom message to provide further instructions or a follow up update. The Thank You message pops up when the end user completes a workflow. It is best to keep the message brief.
Notification Inbox - The notification inbox is used to override notifications sent to the original sender. You can add a specific email to the notification field to suit your needs.
This feature is generally used when you want to redirect the notification to a general or group inbox, rather than to the individual who sent the invitation.
Note: Add multiple email addresses to notify more than one collaborator when a session has new activity
with a space and a comma (i.e. upon first upload and/or completion).
Notification Settings - Select the frequency of your email notification from the following options:
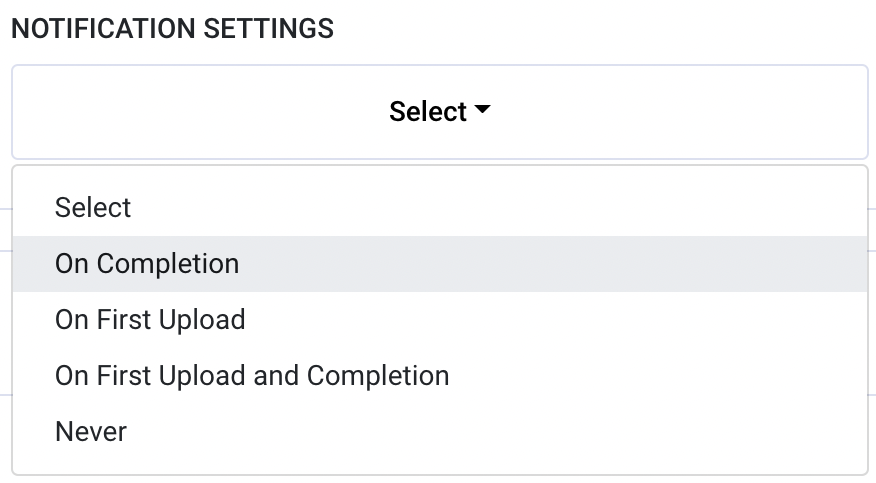
- On Completion to get an alert when the end user has completed all tasks in a workflow session.
- On First Upload to get an alert when the end user has submitted one task item to their session.
- On First Upload and Completion to receive alerts upon first submission and when the workflow is complete.
- Never to not receive any emails at all.
Branding
Company Name - Add your company name as you would like it to appear on the Service App and for all banners on the mobile interface.
Terms of Service URL - Add a PDF link to your company's terms and conditions. Make sure to verify the link is in the appropriate language.
Privacy Policy URL - Add a PDF link to your company's privacy policy.
Note: Make sure to verify links are active and set to the appropriate language
for your project's locale.
Logo - Upload your company's logo to personalize the customer experience. Acceptable formats are PNG and JPEG. For best results, upload your logo as a vector file.
Note: Contact us to customize your logo or if issues uploading your logo persist.
Live Video Template - If you have created a custom landing page, select it from the drop down option.
Privacy
Contact Strategy - This feature allows you to save a customer's contact information. It is used to activate the Reminders feature.
Select 'store' to activate reminders to send custom SMS or email alerts to complete a workflow. Keep it set at 'discard' if you do not want our system to store the customer information.
Note: By default, we do not store customer contact information.
Enable GPS - Enable the GPS feature to request geo-coordinates from the end user. When this feature is activated, the user's mobile device will prompt them to share their location. When the user accepts, their data (including longitude and latitude coordinates) will be available to you.
Record Live Video Sessions - Select yes to automatically record live video calls and images taken during the live call. This setting is set to no by default.
Data Retention - Select your data retention for the length of time in which you want to store data in the cloud before permanently erasing it from our system.
Private S3 Storage - Customizing S3 bucket redirects saved data to your own cloud service. Contact the IT department for assistance.
Note: There is a save button in every section. Remember to save any changes made
for each section.
...and that's it! You've successfully set up a project.
To download this article, click print from your browser to save it as a PDF.